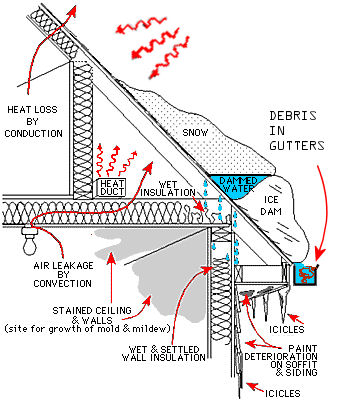
Ice dams form when snow on your roof melts and refreezes over time. This often happens when warm air from inside the house escapes into the attic and heats the roof. Even when outdoor temperatures are well below freezing, that escaping heat can melt the snow on your roof. When the melted water reaches the colder edges near the eaves, it refreezes, forming a dam.
Water then backs up behind the dam and can find its way under shingles, through the roof deck, and into your home—causing damage to ceilings, insulation, and walls (see Figure 1).
How to Spot an Ice Dam
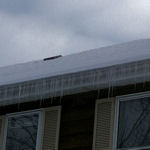
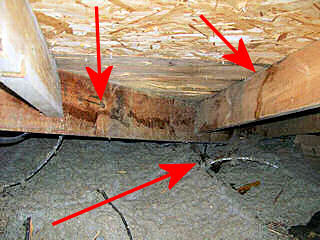
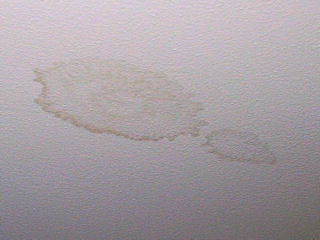
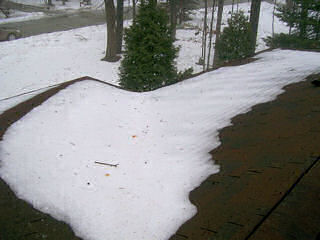
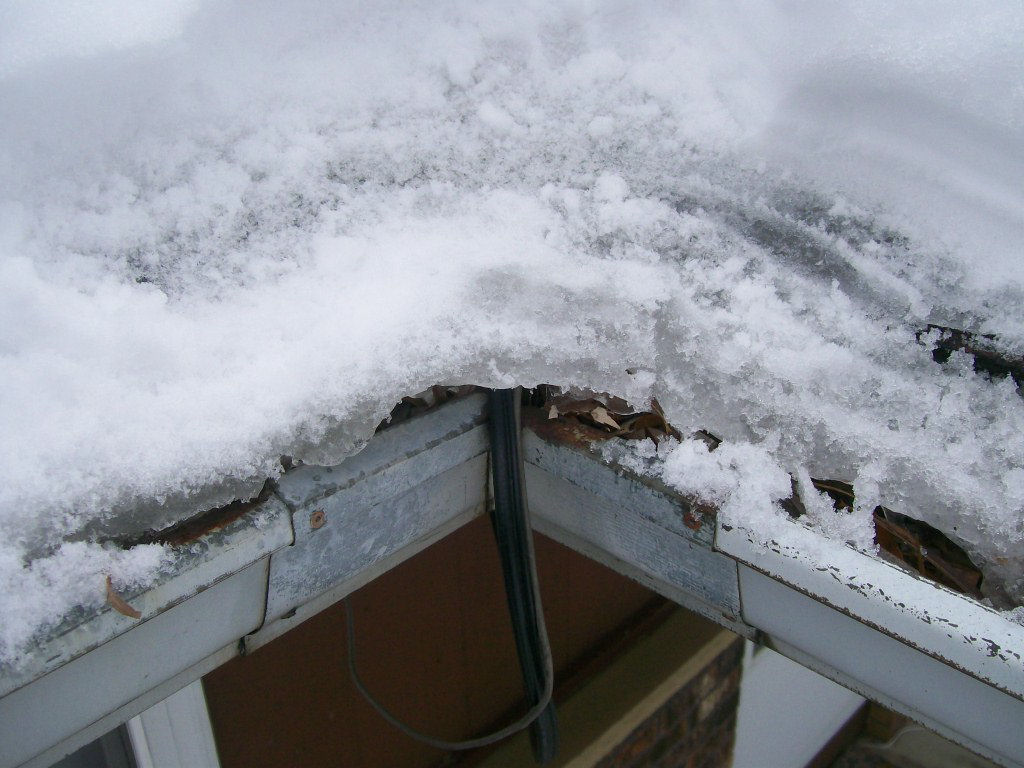
Look for melted patches on your roof after a fresh snowfall—especially around chimneys, skylights, plumbing vents, or other areas where heat might escape. These “hot spots” often suggest insulation gaps or air leaks. Other warning signs include icicles hanging from gutters or soffits, water stains on rafters, or ceiling discoloration. These may indicate water backing up into the attic due to a developing ice dam (see Figures 2–5).
Maintain and Check Your Gutters
Clogged gutters slow the flow of water, making it easier for water to freeze. Clean your gutters in the fall and again in the spring. Think of it like a slow-moving river: fast-flowing water doesn’t freeze as easily, but stagnant water will. Some homeowners even paint their gutters black to absorb more heat from the sun—talk it over with your significant other first! (See Figure 6.)
Use a Roof Rake Safely
Remove snow from the first 4–6 feet of your roof using a long-handled roof rake. Do not use a ladder or try to walk on the roof—even if it looks safe. Ice is extremely slippery. Protective gear like safety glasses, gloves, a thick jacket, and even a hard hat are recommended. Pull snow down gently and make sure you have a clear path behind you in case snow or ice slides suddenly.
Dealing with Stubborn Ice
Never chip away at ice with sharp tools—you may damage your roof and shingles. Consider installing heated gutter and roof cables to help keep snowmelt flowing. Ensure the cable system is plugged into a GFCI outlet and follow all manufacturer safety instructions. Avoid long extension cords.
Ice Melt Methods
Fill a nylon stocking with magnesium chloride or calcium chloride (not rock salt) and place it perpendicular over the ice dam. This creates a channel for water to flow. Use multiple “socks” spaced evenly, and keep gutters as clean as possible so meltwater has a place to drain.
Using Hot Water
Hot water can sometimes help melt an ice dam—but only if there are no active leaks. Be cautious: runoff can refreeze quickly and create dangerous slip hazards. In many cases, professional steam removal is safer than DIY methods.
Attic Improvements
Insulation and ventilation are critical to preventing ice dams. Check for a vapor barrier under your insulation. It should be on the warm side (directly above the ceiling). Seal air leaks with appropriate materials (including spray foam products), but never seal around recessed lights unless they are rated for insulation contact.
Check Your Insulation Levels
Wisconsin recommends a minimum of R-38 attic insulation. Use this guide to estimate proper thickness:
- Fiberglass batt (about 3.14 per inch): ~12 inches
- Blown fiberglass (about 2.2 per inch): ~18 inches
- Blown rock wool (about 3.1 per inch): ~12 inches
- Blown cellulose (about 3.13 per inch): ~12 inches
- Vermiculite (about 2.13 per inch): ~18 inches
Important: Never insulate over knob-and-tube wiring without first consulting a qualified electrician.
Ensure Proper Attic Ventilation
Exhaust fans from bathrooms and kitchens must vent to the outdoors—not into the attic. Attic ventilation systems typically include a combination of soffit, gable, ridge, or roof vents. A common guideline is 1 sq. ft. of ventilation per 300 sq. ft. of attic floor area, with half located low and half high to promote airflow.
Install Snow and Ice Barriers
When re-roofing, ensure an ice and water shield membrane is installed from the edge of the roof extending up at least 3–4 feet (and more where required at valleys and low-slope transitions). This extra layer helps prevent water intrusion under shingles.
Final Thoughts
Understanding the causes and signs of ice dams is the first step toward prevention. Regular maintenance, air sealing, insulation improvements, and proper ventilation are the best long-term solutions. If you need help diagnosing or solving an ice dam issue, consult a qualified roofing or insulation professional.